6504-blogspot

  • Subscribe to our RSS feed.
  • Twitter
  • StumbleUpon
  • Reddit
  • Facebook
  • Digg
Posts mit dem Label Dessert werden angezeigt. Alle Posts anzeigen

Freitag, 14. März 2014

Monkey Bread

Posted on 07:48 by chsndrapaul
As promised (yesterday in my Disney Countdown Movie Night) here is the Monkey Bread my family is in love with......
 Doesn't it look delicious? Well, this picture isn't lying!
If you've never made Monkey Bread before, stop everything RIGHT NOW and go make some.
Then come back and thank me for changing your life. Okay... I'm kidding... or maybe not....
Seriously though, here is an easy recipe to try. YUM.


Start with a can of Pillsbury Grands Homestyle Butter Tastin' biscuits.
You can use another kind of biscuit, but I have and I'll tell ya, it's just not the same. Since I always have the other ingredients on hand that are needed for this recipe, I don't mind splurging on the Grands!
 Pop open the can and cut each biscuit into 6 pieces.

Let your biscuits hang out on the cutting board for a minute while you mix 1/4 cup sugar and 1 1/2 teaspoons cinnamon in a gallon size bag. 
When your sugar and cinnamon are mixed, add your cut biscuits to the bag. Close and gently shake it around until all the biscuit pieces are covered.

Next, you'll need to melt 1/2 a stick of butter or margarine and then add that to 1/4 cup brown sugar.
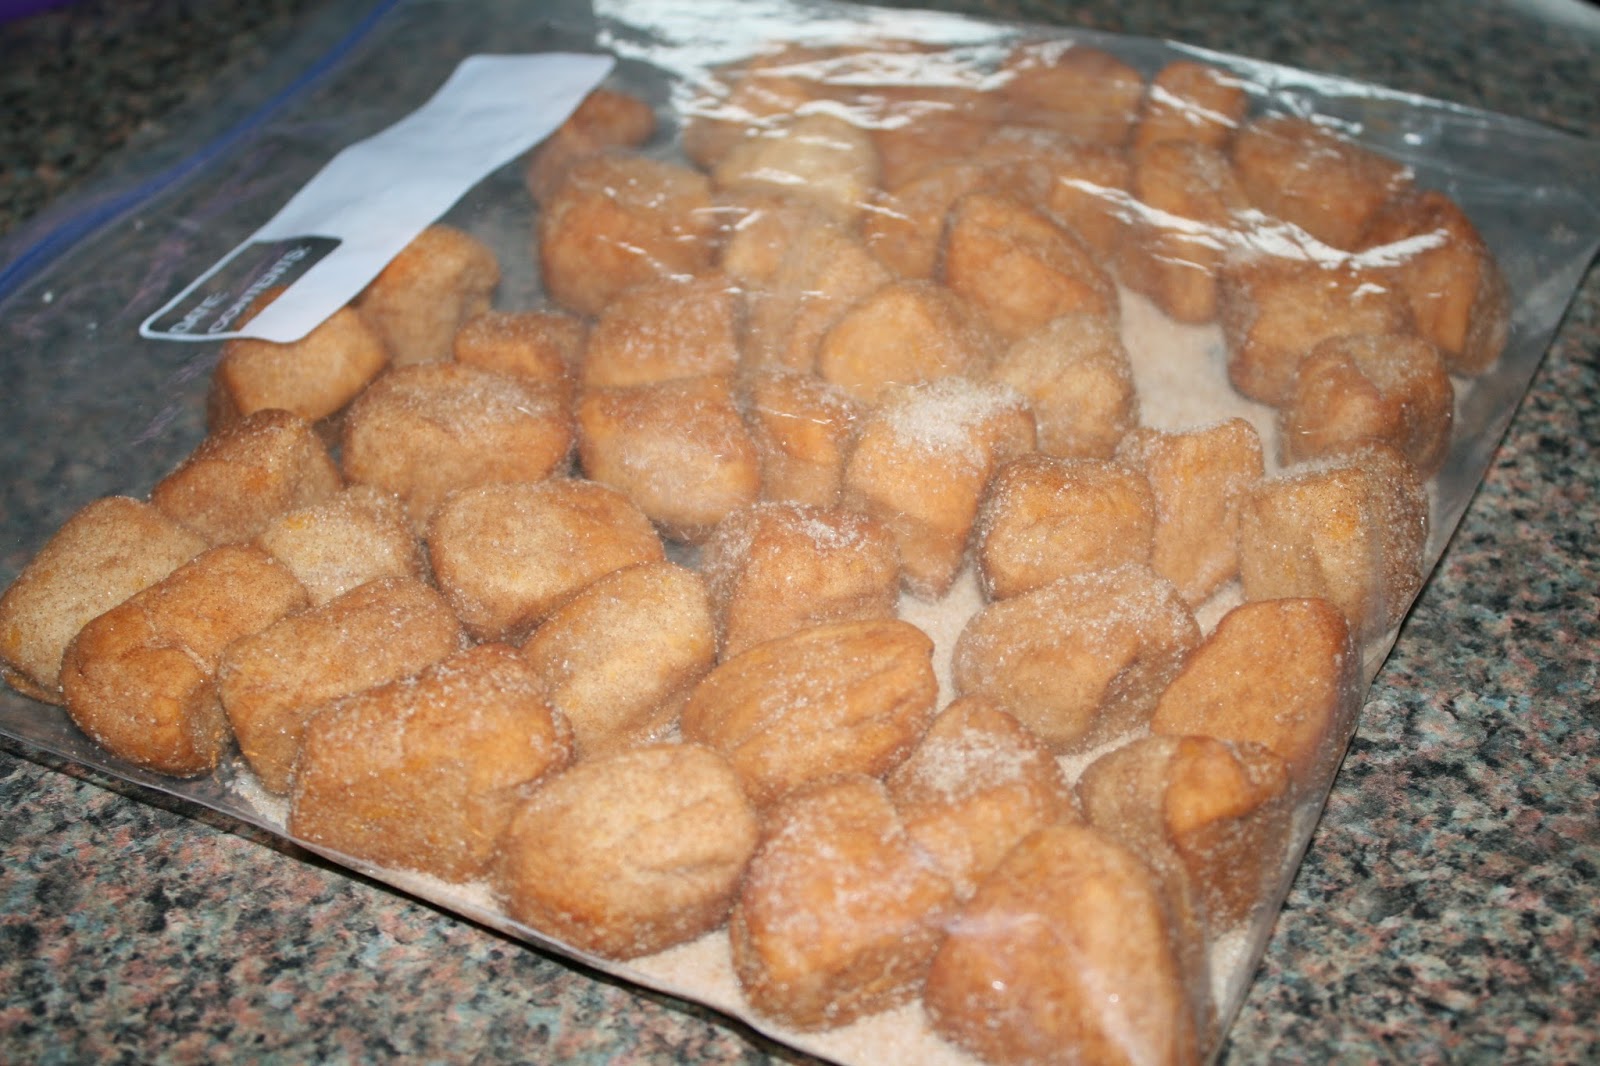
This is the sticky yumminess that your monkey bread will be sitting in. It might just be the best part!

When you've mixed the melted butter and brown sugar, you'll need to spoon some into each of your 8, sprayed, muffin cups. It evens out to (almost) a tablespoon of butter/brown sugar goodness per muffin cup.
Now you need to divide your coated biscuit pieces evenly between your 8 muffin pan cups. Each muffin cup will have 6 pieces of biscuits.
(If you have any extra sugar/cinnamon mixture in the bottom of the bag, sprinkle it on your biscuits.)

I place my muffin pan on a cookie sheet for baking. I've have it bubble over into my oven one too many times!
Bake in a preheated 350* oven for 15-18 minutes (or until the centers are not gooey- we don't like gooey dough around here.)

 Let them rest a few minutes in the pan before you turn them over and let them plop out. (I use my cookie sheet for this so I don't have to wash another dish.)

  Plate and serve! (There usually isn't time to plate them... little monkey hands take their bread right off the warm pan!)

I used this recipe as my dessert on our Disney Countdown Movie Night. I called it 'Abu's Monkey Bread' since we were watching the Disney movie Aladdin. But to be honest, it's usually a weekend breakfast treat. 
Morning, Noon or Night, you are sure to enjoy!


Monkey Bread
Here's What You'll Need:
1 can Pillsbury Butter Tastin' Biscuits
1/4 cup granulated sugar
1 1/2 teaspoon cinnamon
1/2 cup butter or margarine, melted
1/4 cup brown sugar

Here's How:
1. Preheat oven to 350* and spray 8 muffin pan cups with non-stick cooking spray.
2. Cut your biscuits into 6 even pieces.
3. Combine your granulated sugar and cinnamon in a zip closer bag. Add your cut biscuit pieces and shake gently to coat evenly.
4. Combine your melted butter and brown sugar in a small bowl and divide even among the sprayed muffin cups. (About 1 Tablespoon per muffin cup.)
5. Divide the coated biscuits evenly among the muffin cups. (6 pieces of biscuit in each)
6. Bake for 15-18 minutes until the dough is cooked through. Allow the monkey bread to cool slightly in the pan before you turn them over onto a pan or serving platter. 
Read More
Posted in Bread, Breakfast, Dessert | No comments

Montag, 10. März 2014

Salted Carmel Cupcakes

Posted on 07:39 by chsndrapaul
Salted Carmel Cupcakes...
this just screams Starbucks doesn't it?

I'm pretty sure coffee flavors were what my Starbucks-lovin' husband was thinking when he was parusing my 'sweet treats' Pinterest board for his birthday cupcakes and came across these. 
It took all of 1/1,00 of a second for him to decide as soon as he saw them.
(Do you remember the Double Chocolate Chip Frappuccino Cupcakes he requested two years ago?)

My first thought about the Salted Carmel Cupcake pick?
Good choice. 

And indeed, it was.

Amber over at CrazyLittleProjects shared this recipe and I am so glad she did.

I love that the cupcake recipe uses a box cake mix to make it a little easier. You could very easily substitute your favorite chocolate cake recipe.
I was a little nervous about the homemade carmel sauce but it came out perfect. (Confession: I did buy a jarred carmel sauce... you know, just in case. I've had a few very unsuccessful carmel attempts in the past!)

The only change I made was to use flaked sea salt rather than kosher salt to sprinkle on the cupcakes. I just love seeing those pretty little flakes sitting in the sticky carmel sauce. 

Flaked sea salt on dessert just happens to be my new favorite thing.
Especially when they are sprinkled on these cupcakes!


Happy 31st Birthday to my favorite person.
(I can't wait to see what cake he picks for next year!)
Read More
Posted in Birthday, Carmel, Chocolate, Cupcakes, Dessert | No comments

Montag, 28. Oktober 2013

Pumpkin Chocolate Chip Blondies

Posted on 08:04 by chsndrapaul
Did you know that Saturday was National Pumpkin Day?

We celebrated by taking the kids to the Pumpkin Patch.

It was the Little Pumpkins first time!


Even though it was chilly, my Big Pumpkins had fun too!


 In honor of National Pumpkin Day I'm going to share with you my new FAVORITE pumpkin recipe.


These blondies are very easy to make, but I guarantee it's more fun with little helping hands!

 (I love the perfectly placed chocolate chips!)


These are as good as they sound, look and smell! They are super moist and the perfect dessert or snack.


Pumpkin Chocolate Chip Blondies
{from Carmel Potatoes}

What You'll Need:
2 cups flour
1 tablespoon pumpkin pie spice
1 teaspoon baking soda
1/2 teaspoon salt
1 cup butter, at room temperature
1 1/4 cups sugar
1 large egg
2 teaspoons vanilla
1 cup canned pumpkin puree
1 1/4 cup chocolate chips, divided
Here's How:
Preheat oven to 350*. Line bottom and sides of a 9x13 baking pan with foil. In a medium bowl, whisk together flour, pie spice, baking soda, and salt. 
In a separate bowl, cream butter and sugar on medium-high speed until smooth; beat in egg and vanilla until combined. Beat in pumpkin puree (mixture will look curdled). Reduce speed to low, and mix in dry ingredients until just combined. Fold in 1 cup of the chocolate chips.
Spread batter evenly in prepared pan. Sprinkle remaining chocolate chips over the batter.  Bake until edges begin to pull away from sides of pan and a toothpick inserted in center comes out with just a few moist crumbs attached, 30 to 35 minutes. Cool completely in pan.
Lift the blondies out of the pan and peel off the foil. Cut into squares and devour!

Read More
Posted in Chocolate Chip, Cookies, Dessert, Fall, Pumpkin, Pumpkin Patch | No comments

Freitag, 29. März 2013

Perfect Chocolate Icing {on Spring Cupcakes}

Posted on 06:49 by chsndrapaul

I have been on the hunt for a GREAT chocolate frosting. I knew I didn't want to use cream cheese and I tried a fudge frosting but it turned out too runny.
Then when the Hubs asked for yellow cake with chocolate frosting for his 30th birthday, the pressure was on!
I searched and pinned icing recipes on Pinterest for days.
And I came across {this} one from Key Ingredient. It looked simple and I had all of the ingredients on hand.

Let me tell you, it did not disappoint!
-Oh my yum.-
In fact, I've made it twice in the last couple of weeks. And as I'm sitting here typing, I'm trying to come up with a reason that I need to make another cake just to have this icing!
Get ready to kiss that canned chocolate frosting good-bye.

Here's What You'll Need:
1 cup softened margarine
1/2 cup cocoa powder, sifted
5 cups powdered sugar
1 teaspoon vanilla
3-4 Tablespoons milk

Here's How:
In a stand mixer, whip the margarine and cocoa together until smooth.
Stir in vanilla and powdered sugar.
While stirring, slowly stream in the milk until frosting reaches desired consistency.
Scrap down sides and whip.
This is where the magic happens.
It'll turn from pasty, thick icing to glossy, lick your fingers good icing. 1-2 minutes of whipping and it will be fluffy and smooth.

(This is enough frosting for 24 cupcakes.)


I made classic yellow cupcakes (shhhh, it was from a box!) and piped this yummy chocolate frosting on top.
To take them to our Youth Group's Easter Egg Hunt, I topped the icing with toasted coconut and 2 'eggs' to resemble a little birdies nest.
(The eggs were candy Whoppers shaped as eggs.)


And just in case you didn't know......

Read More
Posted in Chocolate, Cupcakes, Dessert, Easter, Spring | No comments

Montag, 18. Februar 2013

Kid Valentines

Posted on 15:45 by chsndrapaul

I love the idea {especially for little ones} of NOT giving candy as part of a Valentine. 

I know, I know... what fun right? 
Well, if you saw the candy, cupcakes, brownies, and suckers my daughter brought home from her school Valentine party, I have a feeling you'd agree that non-candy Valentines can be just as fun!

Here are two we made this year...

For Graham, I fell in love with the idea of bouncy ball Valentines when I first spotted the ones Dandee made HERE.

What 3 year-old boy doesn't love bouncy balls? 

I started by printing the Valentine messages on card stock to be cut...

Then little {super excited} hands helped fill the small clear bags I already had on hand from a craft store.
We decided to include several ball accessories into the Valentines. We found small bouncy balls, ball stickers and assorted ball mini note pads in the party section at Wal-Mart.
All things 'ball' that my 3-year-old would love to receive!

I rounded the corners of the Valentine message before stapling them to the bag.

He was one proud little guy carrying this box of Valentines into his Wednesday night Church class to pass out to his friends!


Reese's school Valentines took a little more time.
Gone are the days of braiding three strands of embroidery floss and tying a knot at the end and calling it a bracelet.
Now, you need time, patience and one of these....

I'll admit, you can make some pretty neat bracelets with that machine, but since it was my first time, I decided to start with the least-complicated version. I kept it easy on myself and made all the bracelets the same, just changing the colors. That part, Reese gladly helped. :)

This was another idea from Dandee and I was able to print her Valentine Message for these adorable 'Knot' Valentines HERE.

After I printed them on card stock, I cut them out in circles and hole punched two holes in each to hold the bracelet.


Reese's gift to her teacher was a 'Cupcake Box'. All the things, in one box, that she will need to make herself cupcakes! (Valentine oven mitts, hand towels, and spatula, a cupcake holder, a cupcake corer, cupcake liners and sprinkles. And of course, a box of cupcake mix and frosting!)

I found these super cute boxes with chalkboard windows. I think I'm going to go back for more! I keep finding things to use them for!


And for Reese's School Valentine party, we signed up for Rice Krispie treats. Her Daddy makes one killer Rice Krispie treat! ;)
(I threw him a curve ball when I suggested making them look like ice cream cones.)
They turned out adorable!

He put the Rice Krispie treat in a cake cone and then we melted chocolate for the top.
Topping it with a little love in the form of heart sprinkles.


Don't forget your lunch!!!!
(A heart-shaped PB&J sandwich, of course!)


Read More
Posted in Dessert, Valentines Day | No comments

Freitag, 15. Februar 2013

Valentine's Day 2013

Posted on 08:30 by chsndrapaul
Our kids woke up on Valentine's Day to these....
Daddy and Mommy 'heart-attacked' their door in the night. Each heart has something we love about them.
I could have easily made 5,873 more hearts. There's just too much to love about my kids!


Other than the necessities, it's very rare that we buy our kids 'stuff' when we're out. (That's what grandparents are for, right?!?!?!?) So, when holidays come around, they get fun,
not-necessarily-needed treats from Mommy and Daddy.

This year's Valentine's included, shovels (for snow playing), cups, forks, spoons, candy, note pads, new shoes and their current favorite thing to play with, Playmobile.


Hand made notes for Daddy from the kids....
And I do mean hand-made. They painted their hands to form heart shapes!


A little love goes a long way....
So does a tooth pick and red nail polish!

Dinner was Peppered Chicken that I posted about {HERE}, served with a sweet pea risotto.
And OH MY! I forgot how good this chicken tastes! (This time, I added grated lemon peel to the pepper mixture to rub the outside of the chicken.)
It's been about a year since I made it, but I won't be waiting that long to make it again!

And for dessert....
Magic Mousse Jello (recipe found HERE) and Strawberry Brownies cut into hearts.

The Magic Mousse was easy and delicious. I even made mine sugar-free!
And the Strawberry Brownies couldn't have been easier either!

{Mix a box of strawberry cake mix with 2 eggs and 1/3 cup of oil. Spread it in a 9x13 pan and bake at *350 for about 15 minutes. Top warm brownies with a glaze by mixing 1 cup of powdered sugar and 1 1/2 Tablespoons of milk. Cool, cut and enjoy!}


Read More
Posted in Chicken, Dessert, Dinner, Valentines Day | No comments

Freitag, 19. Oktober 2012

S'mores Cake Bars

Posted on 05:46 by chsndrapaul

Gooey, Yummy, Easy.

S'Mores Cake!


I was asked to write a guest post, earlier this week, for a sweet friend! What a better fall recipe than an indoor s'mores?

Visit This Hungry Mama Bakes to check out my post on S'Mores Cake Bars and tons of other recipes Tammy has posted!
Your tummy will be glad you did! :)

Read More
Posted in Cake, Dessert | No comments

Dienstag, 28. August 2012

Strawberry Pie

Posted on 07:39 by chsndrapaul
{Read that title again, in your most Southern twang accent...
Strawberry Paaaa. There, that's better!}

I've often heard people refer to things in the 'simple times'. Well, rarely do I feel like things around here are simple. Except last night when I made this Strawberry Paa.


Start with a basic graham cracker crust. Mine was store bought. Think simple times.

Prepare a pound of strawberries by removing the stem and slicing them.

Bring to a boil: 1 cup sugar, 3 Tablespoons corn starch and 1 cup of water.

When it comes to a boil and thickens slightly, add a small box of strawberry jello.
Whisk it well.
Yum.
{It smells soooo good at this point.}

Place all your pretty and cut strawberries into your pie crust.

 Pour the hot strawberry goodness right over those pretty strawberries.

It'll look like this...

Now transfer to the refrigerator. My suggestion is to put your strawberry filled crust on a cookie sheet BEFORE pouring the hot liquid into it.
Can't you just see hot red liquid flying across your kitchen floor as you try to put a full, flimsy pie plate in the refrigerator? Yeah, me too.

Chill for at least 4 hours. Then grab a slice....

A little dollop of whipped cream is not optional. It is a must.

The pretty little dollop was for the picture. So, to keep it real, this is how it actually looked when I served myself a piece....

Someone else also prefers whipped cream over almost any dessert. Please ignore the fact that he left the strawberry pie (the whole reason for this post) on his plate after the whipped cream was gone.
Not sure where he got his taste buds. He's anti-bread and anti-mashed potatoes!
Can you believe it?? Me either! (Says the Queen of Carbs.)

Enjoy your Paa, Y'all!!!


Read More
Posted in Dessert, Pie | No comments
Ältere Posts Startseite
Abonnieren Posts (Atom)

Popular Posts

  • DIY Faux Roman Shade
    I've read so many different ways to make your own faux roman shade. (Faux meaning, it doesn't actually work as a shade; this one is ...
  • Fall Pumpkin
    A super cute, super EASY way to give your home that extra special, personal touch....  Chalkboard Message Pumpkin.  Here's How: 1. Wash ...
  • It Never Hurts to Ask...
    When I shopped at Gymboree last week, I had every intention of ONLY buying Reese new school shoes. (This is the second year in a row that sh...
  • 31 Days of Things I've Been Wanting to Do, Day 8: You Raise Me Up
    Have you ever stayed the night somewhere that you literally had to 'climb into bed'? The beds in my parents house are exactly that. ...
  • Happy Fall Y'all!
    Did you think I fell off of the face of the planet? Well, I didn't and the great excuse for my absence....  life is happening too fast! ...
  • Are You Ready For Some Football?
    If you're like me and hosting a Super Bowl Party this weekend, you have probably already been thinking football food! I think 'Footb...
  • Spring Break Fun With Friends
    Last week was Spring Break. Although, it should be called Spring Busy. Because who really 'breaks'? We decided to cram as much fun a...
  • July 4th
    Happy Birthday America! My printable of choice this July 4th (Compliments of  Hostess With The Mostess !) {These kids crack me up.} Sometime...
  • Beefy Macaroni
    Filling. Easy. Comfort. Delicious. {All ways to best describe this  Beefy Mac!  } What You'll Need:  8 ounces elbow macaroni, uncooked...
  • 31 Days of Things I've Been Wanting to Do, Day 27: Nail Flop Turned Sweet Tea
    Some things that you plan on doing don't always turn out the way you wanted. I saw a nail painting technique on Pinterest I wanted to tr...

Categories

  • Appetizers
  • Apple
  • Baby
  • Beverages
  • Birthday
  • Books
  • Bows
  • Bread
  • Breakfast
  • Bump Date
  • Burlap
  • Cake
  • Carmel
  • Chalk Paint
  • Chalkboard
  • Chicken
  • Chocolate
  • Chocolate Chip
  • Christmas
  • Cleaning
  • Cookies
  • Cupcakes
  • Curtains
  • Decorating
  • Decorations
  • Dessert
  • Dinner
  • Dips
  • Disney
  • DIY
  • Easter
  • Elf on the Shelf
  • Fall
  • Family
  • Fathers Day
  • Favorites
  • Felt
  • Gift
  • Gifts
  • Graduation
  • Grilled
  • Halloween
  • Holidays
  • Kid Craft
  • Make-Up
  • Memories
  • Muffins
  • Olympics
  • Organization
  • Paint
  • Painting
  • Party
  • Photography
  • Pictures
  • Pie
  • Potatoes
  • Pregnancy
  • Pumpkin
  • Pumpkin Patch
  • Recipes
  • Sewing
  • Side Dishes
  • Soup
  • Spring
  • Starbucks
  • Thanksgiving
  • Traditions
  • Valentines Day
  • Winter
  • Wreaths

Blog Archive

  • ▼  2014 (16)
    • ▼  Juli (1)
      • July 4th
    • ►  Juni (1)
    • ►  Mai (2)
    • ►  April (2)
    • ►  März (5)
    • ►  Februar (2)
    • ►  Januar (3)
  • ►  2013 (33)
    • ►  Dezember (1)
    • ►  November (1)
    • ►  Oktober (2)
    • ►  September (1)
    • ►  August (1)
    • ►  Juli (1)
    • ►  Juni (1)
    • ►  Mai (1)
    • ►  April (2)
    • ►  März (7)
    • ►  Februar (8)
    • ►  Januar (7)
  • ►  2012 (113)
    • ►  Dezember (10)
    • ►  November (1)
    • ►  Oktober (4)
    • ►  September (2)
    • ►  August (6)
    • ►  Juli (7)
    • ►  Juni (8)
    • ►  Mai (12)
    • ►  April (21)
    • ►  März (14)
    • ►  Februar (15)
    • ►  Januar (13)
  • ►  2011 (74)
    • ►  Dezember (20)
    • ►  November (16)
    • ►  Oktober (31)
    • ►  September (2)
    • ►  August (1)
    • ►  Juni (1)
    • ►  April (3)
Powered by Blogger.

Über mich

chsndrapaul
Mein Profil vollständig anzeigen